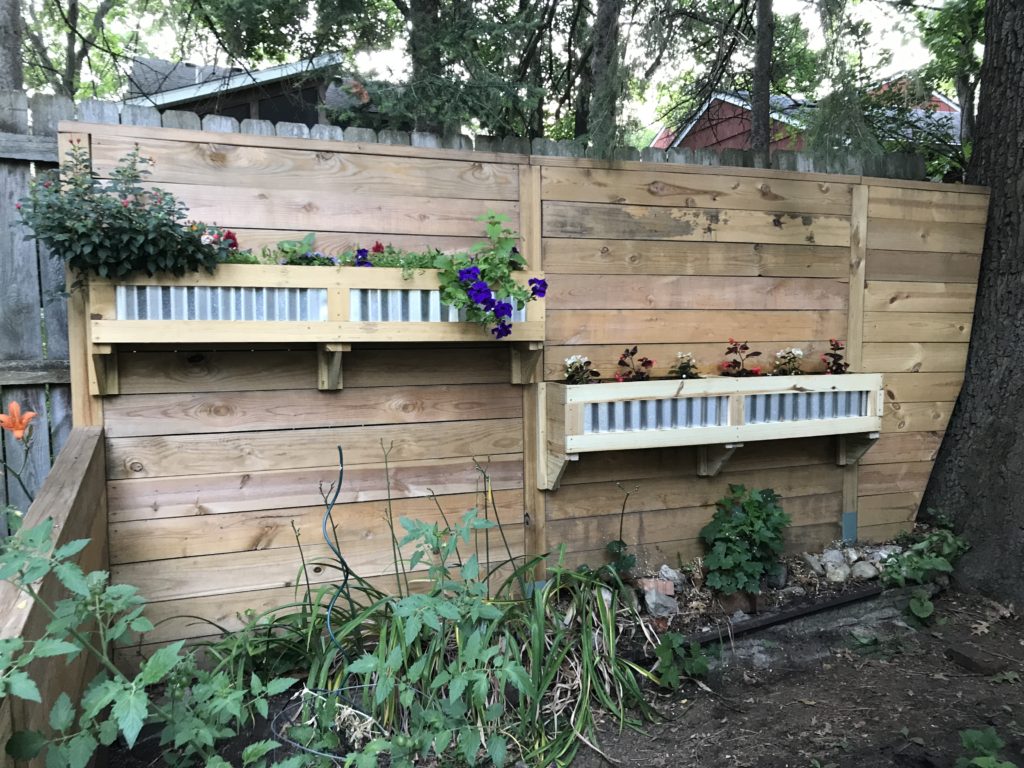
Vertical fence planters! I get a lot of comments about this little project. These planters maximize vertical space and utilize shorter lengths of scrap wood without feeling scrappy. They compliment the metallic ground planters surrounding my deck project, and I built them using leftover scrap wood from the fence project, along with some leftover galvanized corrugated metal paneling.

I start every project with a sketch (above). Soil, especially wet soil, is heavy. The horticulturalist in me knew I needed at least a roughly 6″ x 6″ planting medium in order to support robust plant growth, while the landscape architect in me knew I would need to spread out weight distribution as much as possible. And I wanted the structural performance well showcased aesthetically (form ALWAYS follows function, it is known).
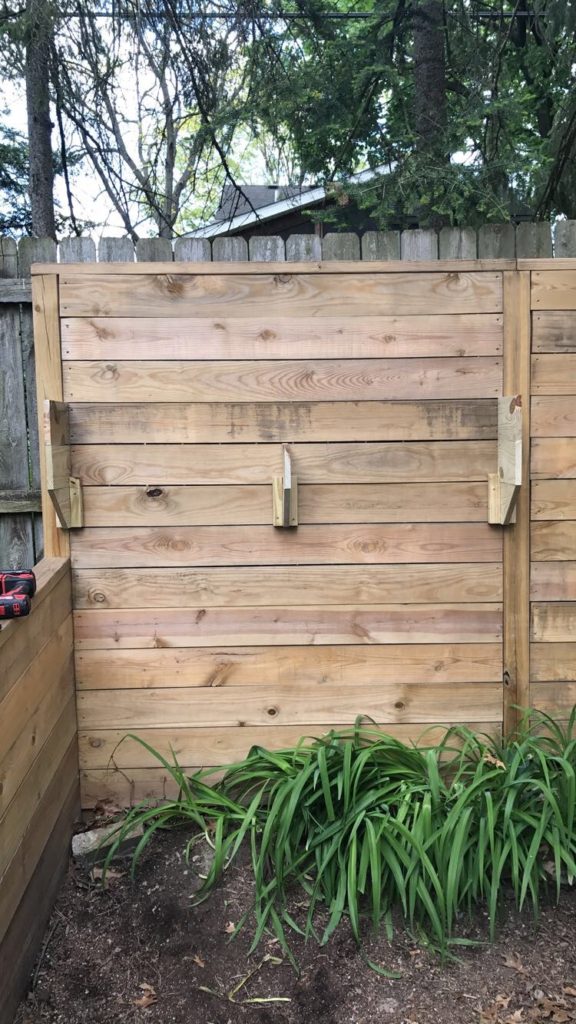
My planter supports vertically span three horizontal fence pieces. These help stack the weight of the planter across the fence, while allow for a ‘floating’ mid-span support at the critical center point of the planter. They also used the same treated 1×6 fence pieces to allow me to perpendicularly align them with fence face coursing. It creates a distinct piece possessing a contextually consistent design aesthetic.
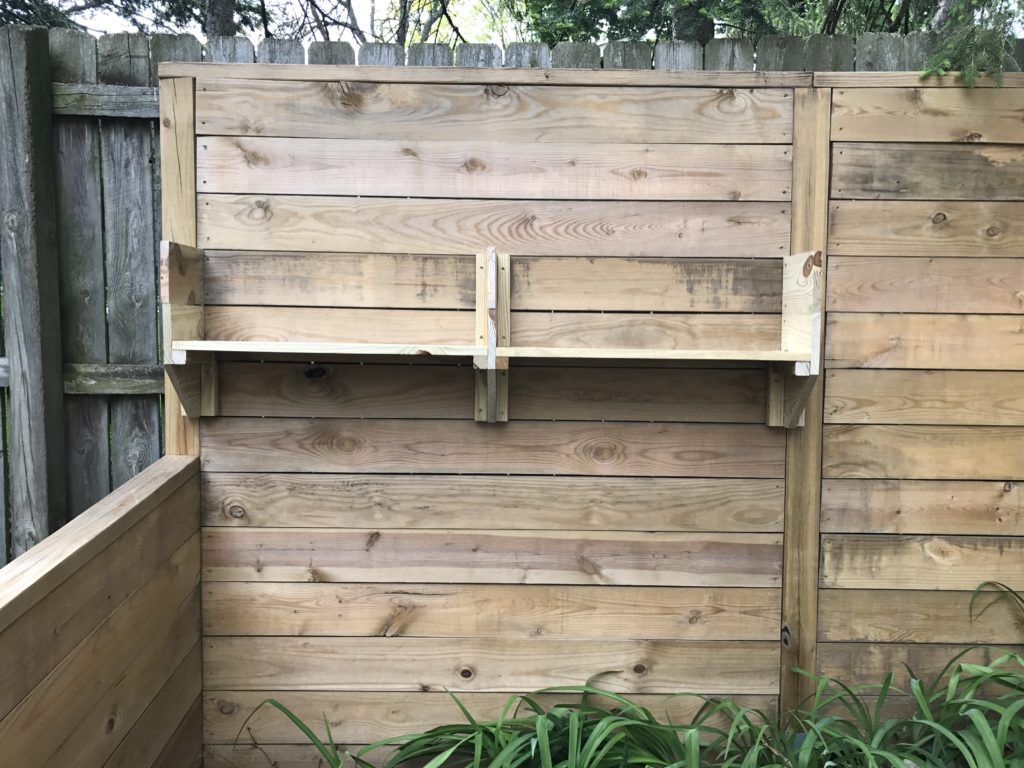
I used scrap 2×2 pieces to fasten protruding planter supports securely to the fence face, while tap existing 4×4 fence posts to anchor planter ends. The 2×2 pieces also act as framing for the bottom of the planter. The bottom planter paneling is just two 1×6 boards laid onto 2×2 framing like pieces of decking.
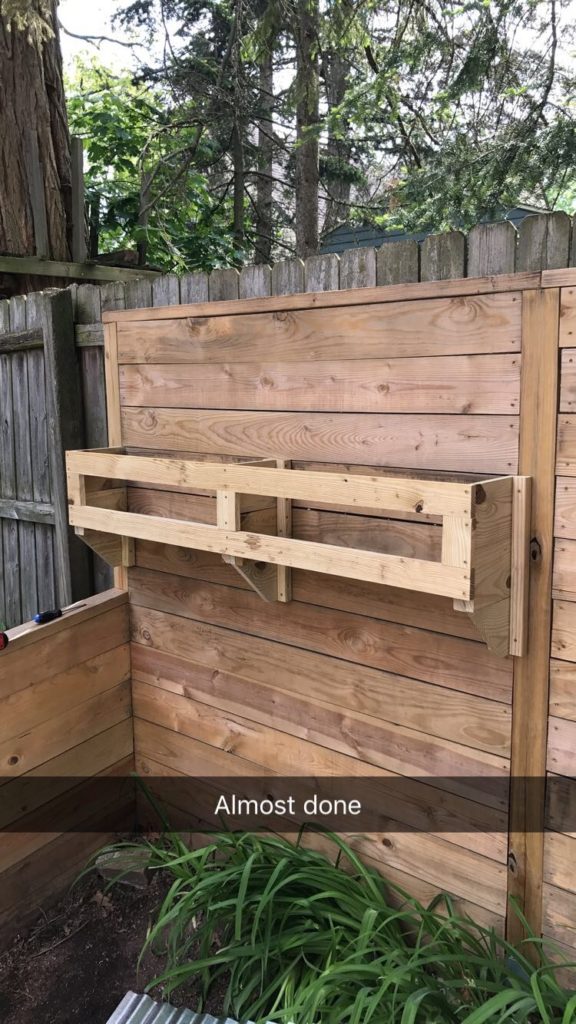
Planter faces are ripped scrap pieces of treated 1×6. I ripped them in half lengthwise, so about 2-3/4″ wide each. These gave the planter a finished looking face that is structurally strong as it provides a frame to mount the corrugated metal.
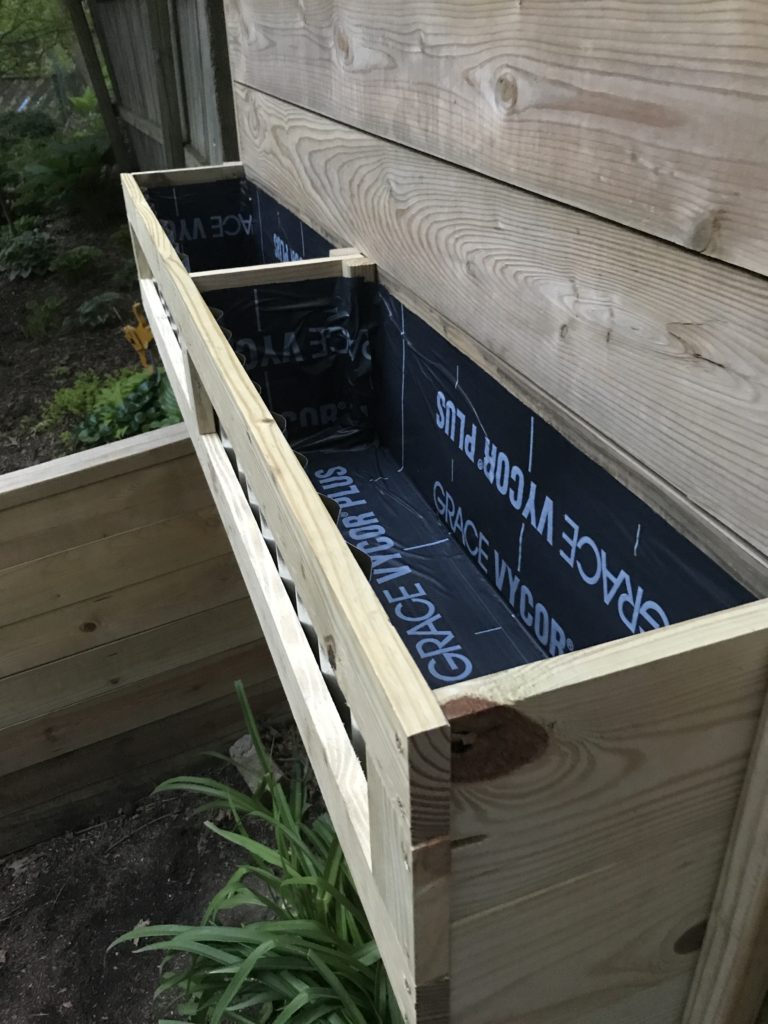
Next I added corrugated metal face panels, and behind that I lined the entire planter with adhesive rubber flashing. While the wood is treated, it is still pine and has seams so I wanted to ensure soil stayed put. And no matter what anyone tells you, it is always good practice to prevent direct moisture contact with wood. While the flashing is designed for moisture it is very photodegradable (breaks down in sunlight), so I situated the top edge of flashing below the top of planter, but like a half inch above where I planned to fill soil. This hid flashing from sunlight and view, but keeps it above water from overtaking it in most conditions.
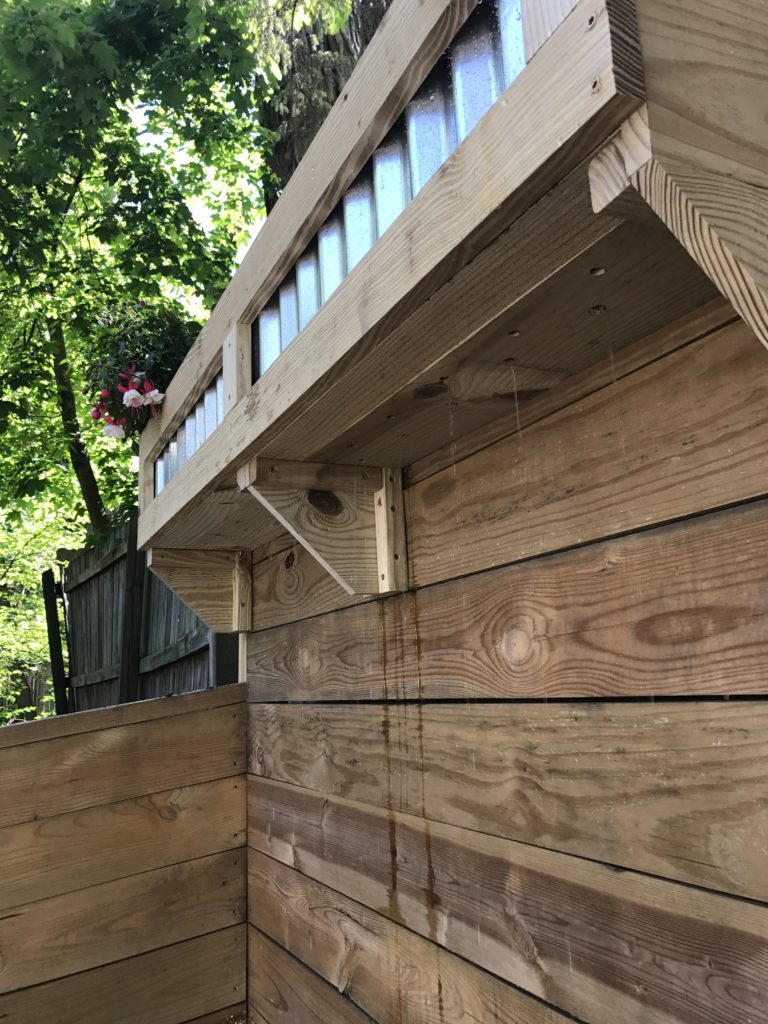
Potted plants require drainage and aeration. This occurs naturally in the ground, but will pool in planters without proper drainage and inevitably stress or kill the plants. In two staggered rows I drilled several half inch diameter holes, about 4″ on-center, directly through the bottom of the planter. I also coated the inside of the holes with a brush of varnish. The image above shows my initial test filling the planter with soil and water saturation to observe drainage.
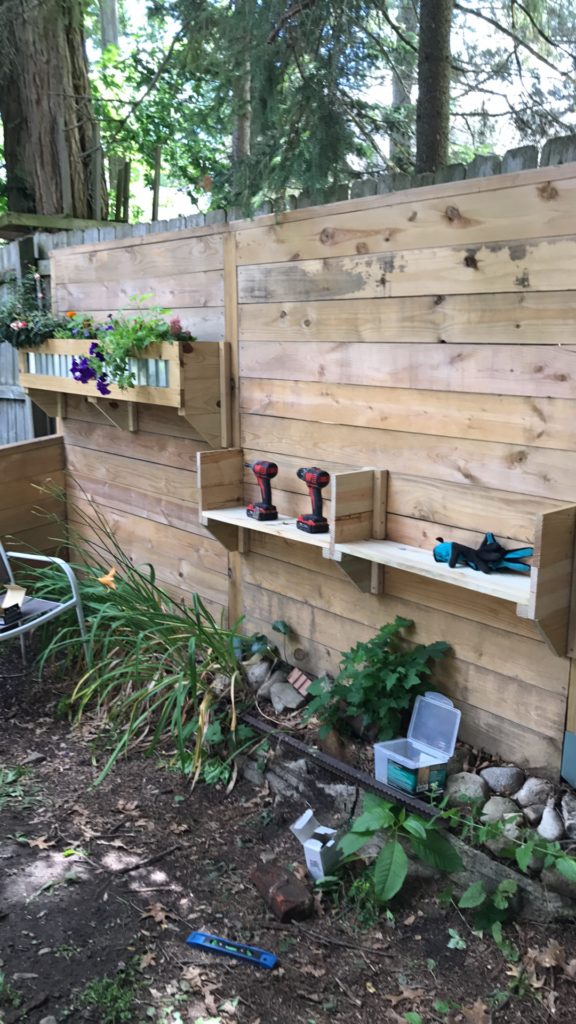
With the first planter completed, I naturally had to install at least one more! I opted to stagger this one down vertically both for constructability and to make it visually interesting, with intent of building yet another lower ground level planter underneath the first fence planter to further the stagger effect (this ground planter has yet to get built).
Work was a lot faster having jumped through design hoops of the first planter. It was a great way to apply a lot of leftover scrap wood from the fence, too, while reclaim garage space! My garage is a mini lumber yard.
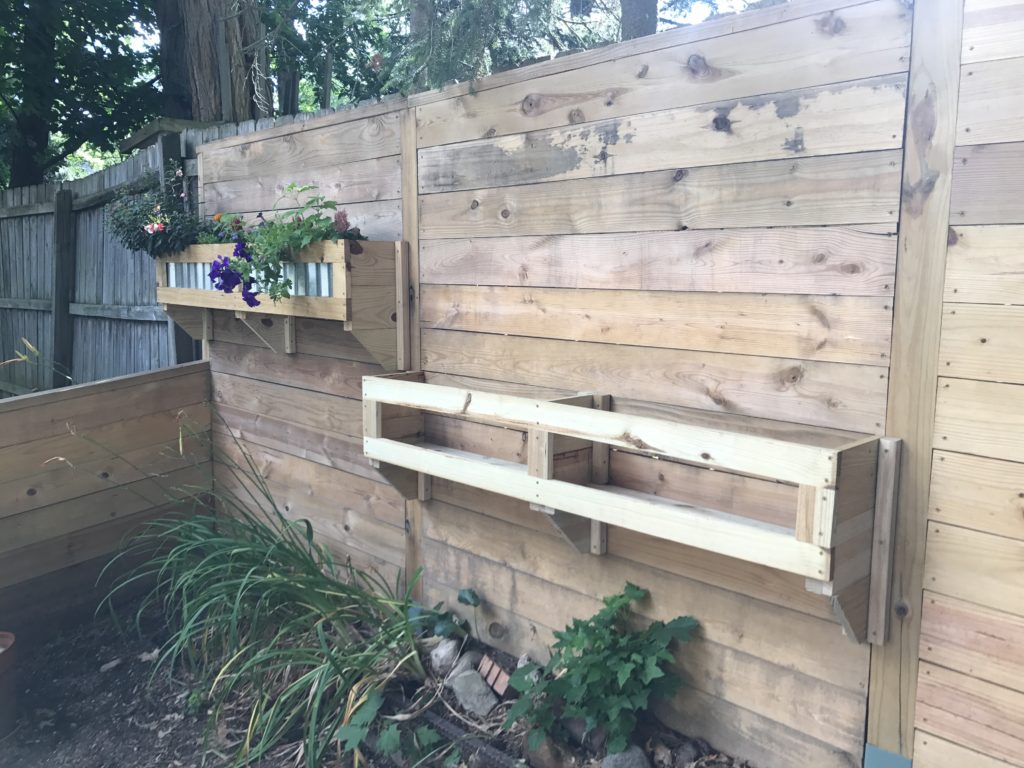
When both planters were finished, filled, and planted the project came to life. These planters are a great way to use vertical space, especially within relatively confined urban yards with large old [oak] trees and coveted areas of sunlight like mine. They also utilize smaller cut lengths of wood that may not otherwise have purpose. I suspect I will build more.