
This is how you build a fence without concrete.
I live in a single-family home in a relatively dense downtown residential environment. Zoning restrictions + setbacks are clear about fence design, and my property is only about 5,000 square feet, so I wanted to maximize my fence to be as close to the property line as possible.
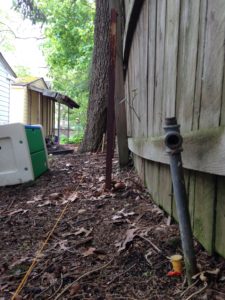

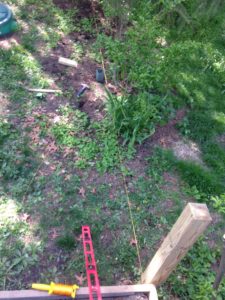
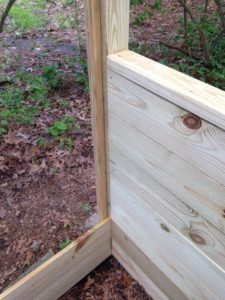
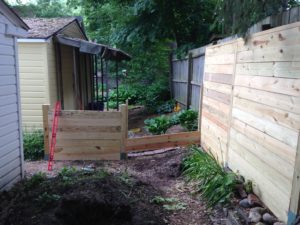
The first thing I did was identify survey monuments. These are ideally already visible at each juncture of a property boundary. Survey monuments on my property were fairly easy to locate (like the yellow one shown above), but two were not readily apparent. I am fortunate to work with generous professional surveyors that let me borrow a monument finder to locate missing ones. A monument finder is basically a long handheld metal detector. If you can’t locate a survey monument, look for physical features such as trees, shrub lines, boulders, etc. as these are often used (and have been used for centuries) to establish boundaries. Once I had identified all of the monuments I hammered wooden stakes just inside them, and ran string to define the outside fence line. Fortunately local zoning only enforced height restrictions on rear-yard fences like mine, without established setbacks, so I was able to tightly hug the property line to maximize yard area.
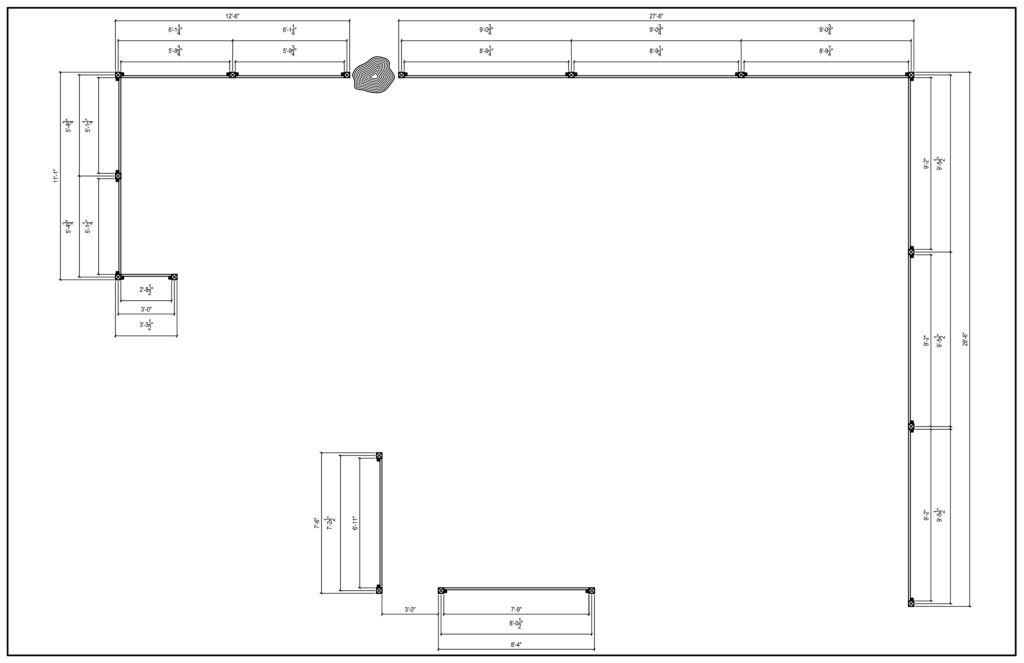
I used a lengthy 150-foot tape measure to sketch out existing conditions, then designed a structurally sound, functional, and architecturally-interesting fence. The design also allowed me to precisely estimate how much wood I would need for construction.
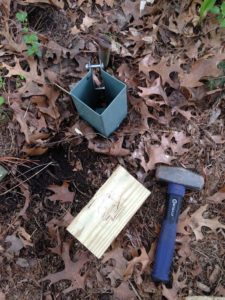
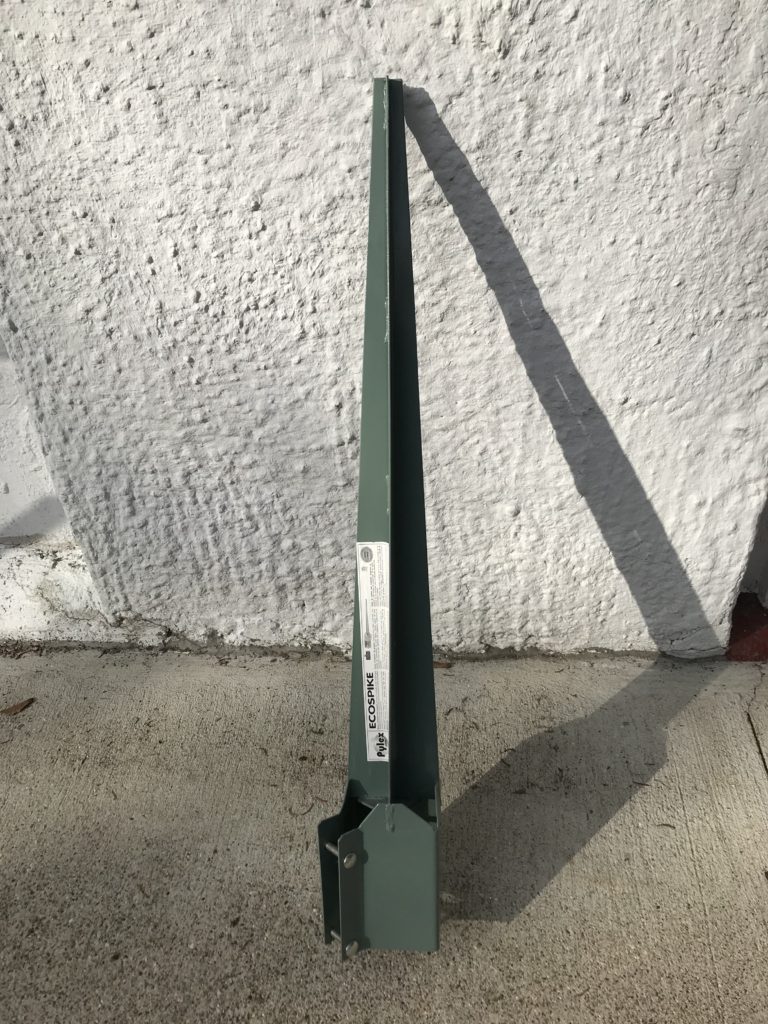
With string tied, I hammered in the first ground spike. I used a plumb level, 4-lb hammer and scrap piece of 4×4 to hammer spikes in place. The scrap wood prevents damage to the spike itself. Also, it would be ill-advised to use the actual post intended for the fence to hammer in spikes, since they can be damaged. This was evidenced in scrap pieces breaking apart after every few spike installs, and besides, you would not want to compromise the structural integrity of the wood. I left my posts a few inches of buffer room on top to ensure a proper finished fit with horizontal fencing.
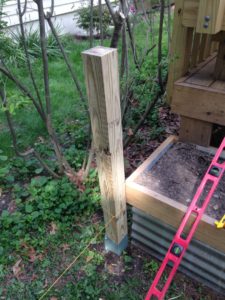
If there are minor adjustments to be made once the actual 4×4 post has been installed, just use another scrap piece of wood between the hammer and top of post as a buffer. Likewise, a properly placed shovel can pry spikes back out as necessary (just don’t make the amateur mistake of breaking your shovel handle).
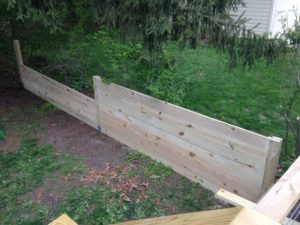

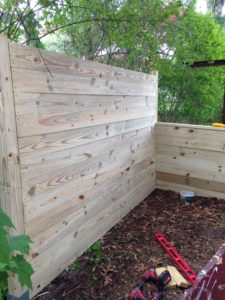
In the image above right you can see how the fence came together structurally. Most residential fences tend to have vertical fencing, using two horizontal structural members (typically 2×4) between posts. This allows for rapid fastening of precut picket-style fencing. I opted for a horizontal aesthetic, and attached lengths of 2×2 parallel to the sides of the 4×4 posts, but set them back about 3/4-inch from the fence face to receive 1×6 horizontal fencing with a flush, finished face of fence. This approach also made the rear of the fence look finished and aesthetically unintrusive, producing an almost stately effect with the posts + cap that ended up well received by my neighbors. One flaw of this approach, however, is that my fence style required custom cutting each horizontal 1×6 fencing (vs. the slap-on pickets from a store like Menards, for example). This work can be a little exacting with the lengths + angles, and is best suited to a mitre saw. Likewise, the 2×2 backing and 1×6 fencing required pre-drilled pilot holes to avoid splits during installation. I would strongly recommend having both a wireless drill and torque wrench to avoid constantly swapping out between drill bits and screws and save a lot of time.
By the end of the first day I’d nearly finished the first fence run. I capped the fence with 2×4. The 2×4 cap gave the fence a clean finished look from both sides while it hid what otherwise would have been the top of its exposed structural guts. I also liked that I could set a flower pot and/or beverage on top of the fence. As a side note this was kind of refreshing for me, since professionally I generally have to design convex/curved or super thin fence caps so that the public can’t leave drinking garbage on top of them. As my yard + fence are sloped, drainage off the top was not a concern.
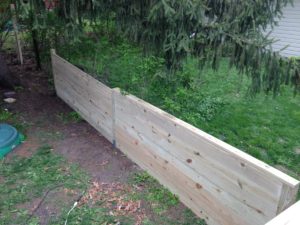
At fence corners the 2×2 were fastened to adjacent sides of the 4×4 at 90-degrees (instead of parallel opposing each other as in fence runs), so that the finished 1×6 fencing terminated clean + squarely into one another.
While rear-yard zoning allowed fences up to a 6-foot height without permitting, the vertical coursing of my 1×6 fencing yielded a height of about 5′-10″ to fall well within zoning compliance, and without having to do much ripping of the lowest 1×6 at ground level. I kept my side-yard fence lower since I did not wish to shut out my neighbors.
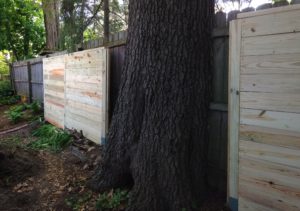
By the end of the second weekend I’d nearly finished the taller rear-facing fence, and had to get creative around a roughly 200-year-old existing oak tree. Owning dogs, I wanted to keep my fence tight enough so that I could let them out in the yard without concern of escape (nor unwanted entry).

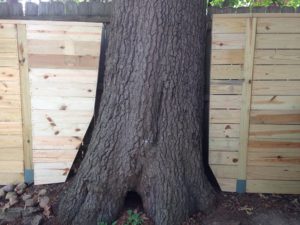
Combining 2×2 with the 2×4 cap and mid-height supports for strength, I framed out a best-fit oak tree shape to receive shorter fence pieces that would effectively frame the tree while still function strong enough to be a restrictive barrier, and without inhibiting tree movement + growth. I thought it produced a cool effect. And before anyone asks: yes, there was a slight and unavoidable grade break on the left side of the tree that would have made the fence >6′ height if I extended it straight across (a massive oak will do that).

I terminated the fence behind my garage. The final length was about 120 lineal feet. The fence also included three gated access points.
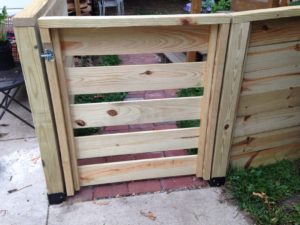
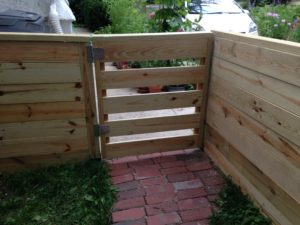
I wanted the gates to appear consistent with the overall fence aesthetic, but also easily function and define clear gateways. I built three of them at different locations for uninhibited circulation. The gate shown above was the primary access point, and proved more tricky since it latched onto a perpendicular fence face. If you look closely at the above left image, I notched the latch into the 2×4 to close on an angled bracket within the rear fence face, then drilled a hole for a through-cable to allow easy latch access from both sides of the fence. The other two gates get much less use, so I did not install dual-sided latch access.
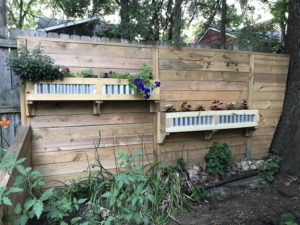
But there was more! A sunny spot was quickly detected near the back corner of the fence, so I eventually added built-in planters. More on these soon!